

Let's make an interactive component for editing time with React.
I've made the component initially for the productivity app Increaser, where you might open the app while working and realize that you forgot to start a focus session, so you can begin one and edit the start time of the session.
import { enforceRange } from "lib/shared/utils/enforceRange"
import { MS_IN_HOUR, MS_IN_MIN } from "lib/shared/utils/time"
import { MouseEventHandler, useEffect, useRef, useState } from "react"
import { useEvent } from "react-use"
import styled from "styled-components"
import { HSLA } from "../colors/HSLA"
import { ChevronDownIcon } from "../icons/ChevronDownIcon"
import { ChevronUpIcon } from "../icons/ChevronUpIcon"
import { SeparatedBy, dotSeparator } from "../SeparatedBy"
import { VStack } from "../Stack"
import { Text } from "../Text"
import { formatDuration } from "../utils/formatDuration"
import { getVerticalMarginCSS } from "../utils/getVerticalMarginCSS"
import { HourSpace } from "./HourSpace"
import { InteractiveBoundaryArea } from "./InteractiveBoundaryArea"
import { MaxIntervalEndBoundary } from "./MaxIntervalEndBoundary"
export interface TimeInputProps {
color: HSLA
value: number
onChange: (value: number) => void
startOfDay: number
startHour: number
endHour: number
max?: number
intialValue: number
pxInHour?: number
}
const Container = styled.div`
${getVerticalMarginCSS(8)}
user-select: none;
`
const currentLineHeightInPx = 2
const CurrentLine = styled.div`
position: absolute;
width: 100%;
border-radius: 100px;
height: ${currentLineHeightInPx}px;
`
const TimeValue = styled(Text)`
position: absolute;
width: 100%;
font-size: 14px;
transition: none;
`
const Session = styled.div`
width: 100%;
position: absolute;
`
export const TimeInput = ({
color,
value,
onChange,
startOfDay,
endHour,
startHour,
pxInHour = 60,
max: optionalMax,
intialValue,
}: TimeInputProps) => {
const hoursCount = endHour - startHour
const max = optionalMax ?? startOfDay + MS_IN_HOUR * endHour
const mintimeStart = startOfDay + MS_IN_HOUR * startHour
const timelineStart = mintimeStart
const height = hoursCount * pxInHour
const pxInMs = height / (hoursCount * MS_IN_HOUR)
const [isActive, setIsActive] = useState(false)
useEvent("mouseup", () => setIsActive(false))
const containerElement = useRef<HTMLDivElement | null>(null)
const timeElement = useRef<HTMLDivElement | null>(null)
useEffect(() => {
timeElement.current?.scrollIntoView()
}, [timeElement])
const handleMouseMove: MouseEventHandler<HTMLDivElement> = ({ clientY }) => {
if (!isActive) return
const containerRect = containerElement?.current?.getBoundingClientRect()
if (!containerRect) return
const y =
enforceRange(clientY, containerRect.top, containerRect.bottom) -
containerRect.top
const timestamp = timelineStart + y / pxInMs
onChange(enforceRange(timestamp, mintimeStart, max))
}
const cursor = isActive ? "row-resize" : undefined
const valueInPx = pxInMs * (value - timelineStart)
const minDiff = Math.round(intialValue - value) / MS_IN_MIN
return (
<Container
ref={containerElement}
style={{ height: height, cursor }}
onMouseMove={handleMouseMove}
>
<HourSpace
formatHour={(hour) => {
const date = new Date(startOfDay + hour * MS_IN_HOUR)
return date.toLocaleString(undefined, { hour: "numeric" })
}}
start={startHour}
end={endHour}
hourLabelWidthInPx={20}
>
{optionalMax && (
<MaxIntervalEndBoundary
timestamp={optionalMax}
y={pxInMs * (optionalMax - timelineStart)}
isActive={isActive}
/>
)}
<Session
style={{
top: valueInPx,
height: pxInMs * (max - timelineStart) - valueInPx,
background: color.getVariant({ a: () => 0.2 }).toCssValue(),
}}
/>
<CurrentLine
ref={timeElement}
style={{
background: color.toCssValue(),
top: valueInPx - currentLineHeightInPx / 2,
}}
/>
<TimeValue
style={{
top: valueInPx - 20,
}}
>
<SeparatedBy separator={dotSeparator}>
<Text>
{new Date(value).toLocaleTimeString(undefined, {
hour: "2-digit",
minute: "2-digit",
})}
</Text>
{minDiff !== 0 && (
<Text as="span" color="supporting">
{formatDuration(Math.abs(minDiff), "min")}{" "}
{minDiff < 0 ? "later" : "earlier"}
</Text>
)}
</SeparatedBy>
</TimeValue>
{!isActive && (
<InteractiveBoundaryArea
y={valueInPx}
onMouseDown={() => setIsActive(true)}
>
<VStack style={{ color: color.toCssValue() }} alignItems="center">
<ChevronUpIcon />
<ChevronDownIcon />
</VStack>
</InteractiveBoundaryArea>
)}
</HourSpace>
</Container>
)
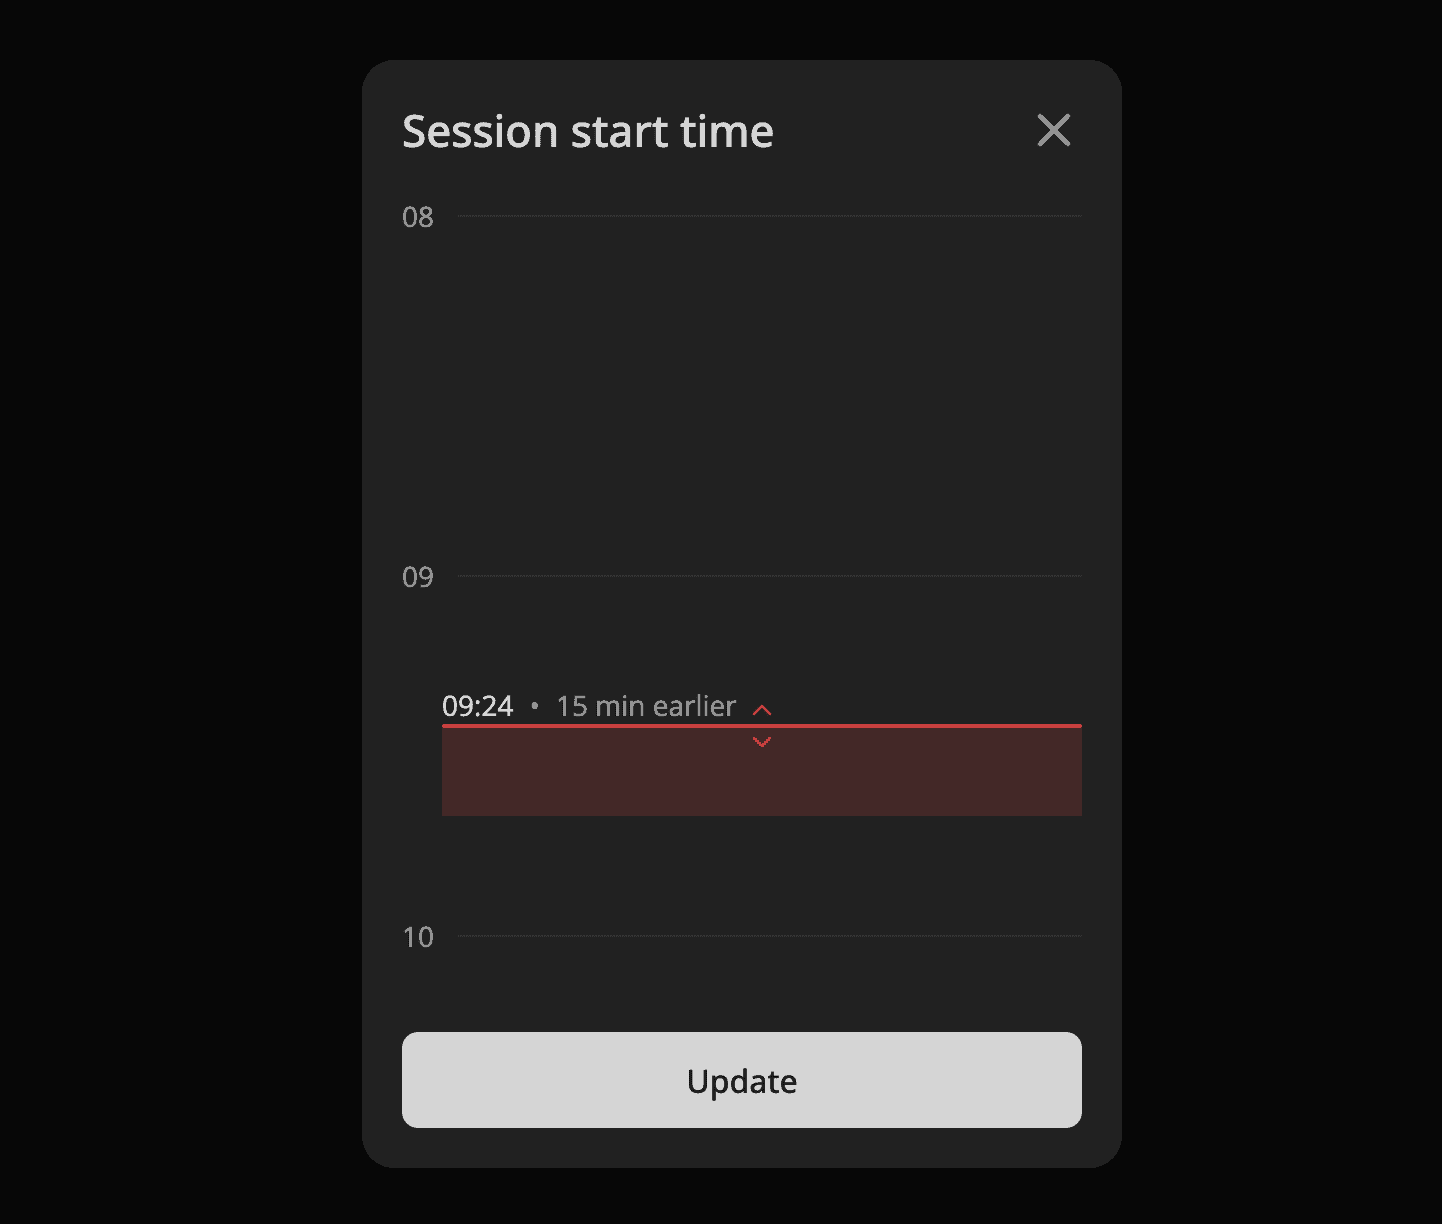
}The component receives the color for the timeline, timestamp for value, on change handler, timestamp of day start, start and end hours of the editor, and optional max value that could be before the end hour, initial value to show the difference, and optional amount of pixels in an hour.
First, we render the fixed-height container that we keep ref of for later usage of its bounding box. Inside we show the hour space component that will render lines with hours and display its children inside of an absolutely positioned element overlaying the lines. If we have the max property, we display a dashed line. At Increaser, it would be the current time because you can start a session in the future. Also, we can highlight the interval from the value to the max timestamp with an almost transparent section. Next, we render the current line representing the value. To make it more friendly for the user, we also want to display the current value time together with the duration relative to the initial value.
Finally, we render an interactive area that will listen to the mouse-down event. Once the user pressed on that area, we no longer need to display it, and we can start tracking position with the container's handleMouseMove function. Here we rely on clientY from the event payload and calculate the new value based on its relation to the bounding box. To stop listening for mouse move, we add the mouse-up event listener to the window and set the isActive flag to false.