

Let's make a resume with React that you can turn into a one-page PDF to find a remote job. If you are curious about advice on how to make a resume for remote work, check out this post.
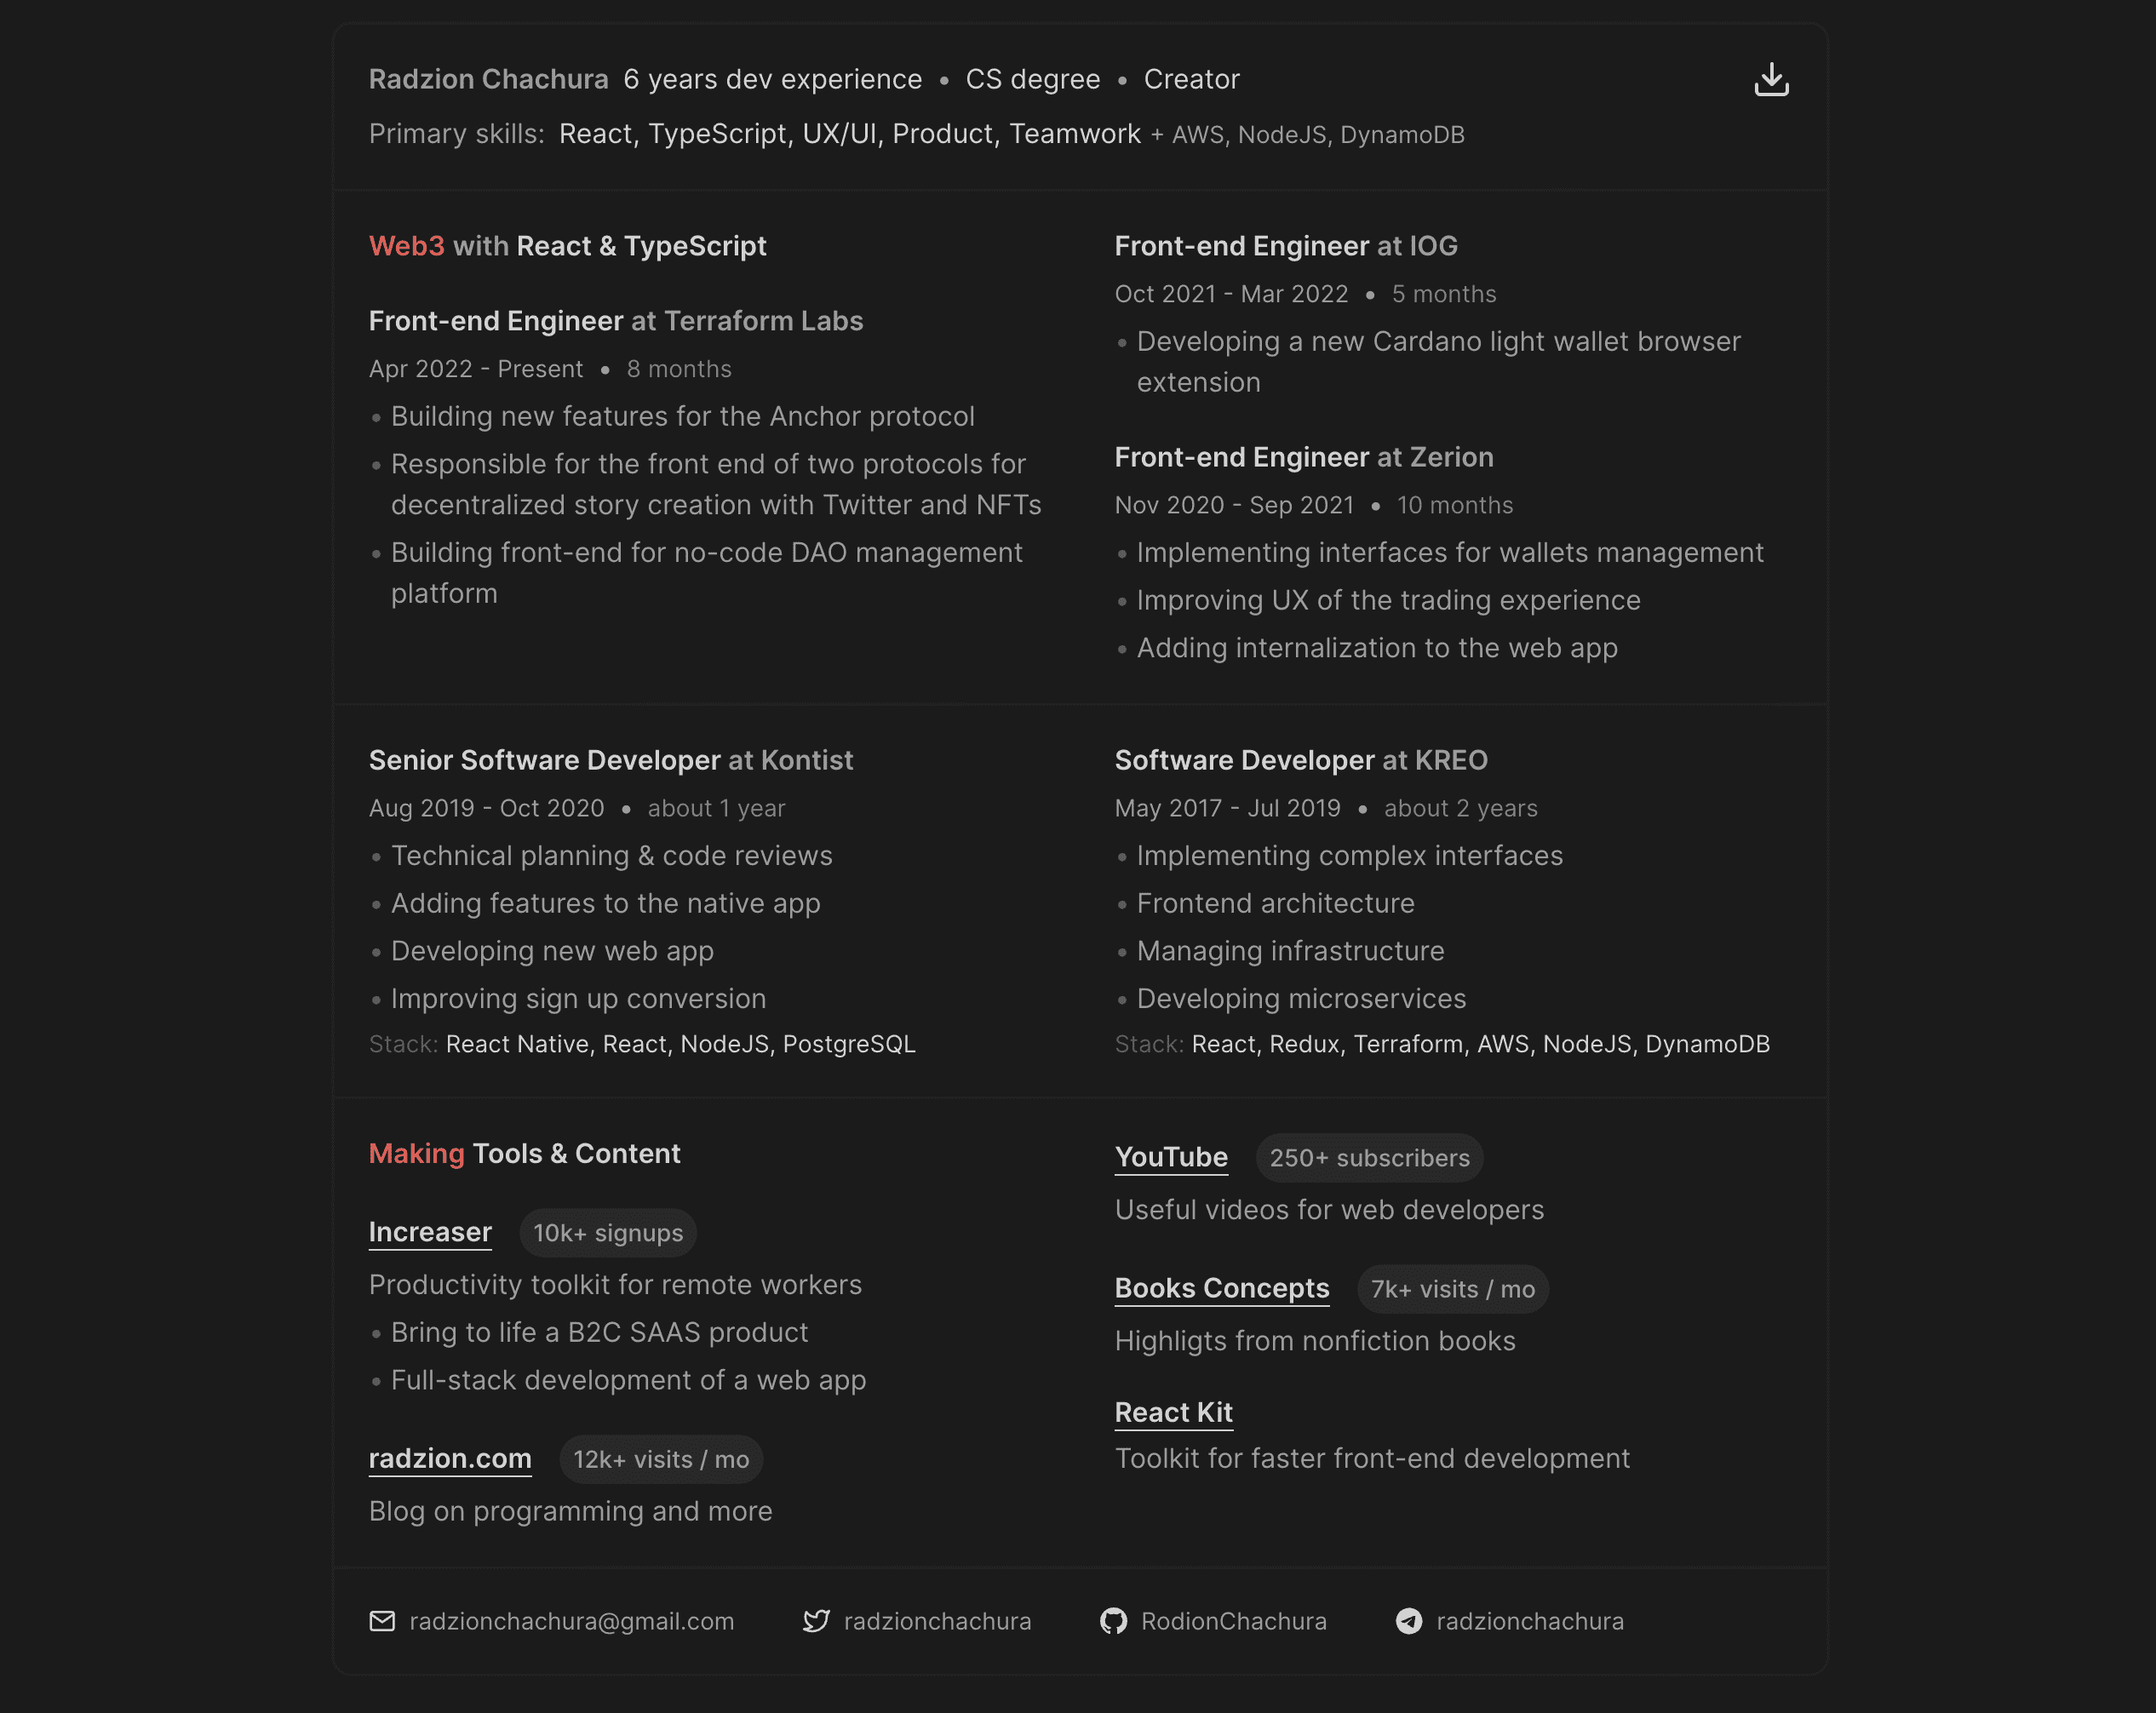
The container has a fixed width and aspect ratio of an A4 page to print the resume onto a single page. To separate sections of the page, we make the container a flexbox element with a background of a separator color while making children that will take the remaining space a black or white color depending on a selected theme. While printing, we want to remove the border and border-radius and make the content take up the whole space of the page by using media print.
import { defaultBorderRadiusCSS } from "lib/ui/borderRadius"
import styled from "styled-components"

export const ResumeContainer = styled.div`
  width: 880px;
  aspect-ratio: 1 / 1.414;

  display: flex;
  flex-direction: column;
  gap: 2px;
  background: ${({ theme }) => theme.colors.foreground.toCssValue()};
  border: 2px solid ${({ theme }) => theme.colors.foreground.toCssValue()};

  ${defaultBorderRadiusCSS}
  overflow: hidden;

  > * {
    background: ${({ theme }) => theme.colors.background.toCssValue()};
    padding: 20px;
  }

  @media print {
    width: 100%;
    height: 100%;
    border-radius: 0;
    border: none;
  }
`
To get a PDF, we use ReactToPrint, which will convert the content when we press the download button.
We start the resume with a summary that consists of two lines. To separate elements, we use the SeparatedBy component that goes over every child and puts a passed React element between them.
import styled from "styled-components"
import { StickyIconButton } from "lib/ui/buttons/square/StickyIconButton"
import ReactToPrint from "react-to-print"
import { DownloadIcon } from "lib/ui/icons/DonwloadIcon"
import { ReactInstance } from "react"

interface Props {
  renderContent: () => ReactInstance | null
}

const PrintButton = styled(StickyIconButton)`
  @media print {
    display: none;
  }
`

export const PrintResume = ({ renderContent }: Props) => (
  <ReactToPrint
    trigger={() => <PrintButton icon={<DownloadIcon />} />}
    content={renderContent}
  />
)
import { ComponentWithChildrenProps } from "lib/shared/props"
import React, { Fragment } from "react"
import { HStack } from "./Stack"
import { Text } from "./Text"
export const dotSeparator = "•"
export const slashSeparator = "/"
interface Props extends ComponentWithChildrenProps {
separator?: string
gap?: number
}
export const SeparatedBy = ({ children, separator, gap = 8 }: Props) => {
const definedChildren = React.Children.toArray(children).filter(
(child) => child
)
return (
<HStack alignItems="center" gap={gap}>
{definedChildren.map((child, index) => {
if (index === definedChildren.length - 1) {
return child
}
return (
<Fragment key={index}>
{child}
<Text color="supporting" as="div">
{separator}
</Text>
</Fragment>
)
})}
</HStack>
)
}After that, we continue with lists of experience where the first one shows the most recent work, the second one older job positions, and the last one - side projects.
The JobExperience component receives position, company, start and end dates, and the list of responsibilities with technologies to render a summary of work at a given position. To show a personal project, we use a similar component that doesn't have the start and end dates but receives an achievement, description, and URL. Finally, we include a footer with links to email, Twitter, Github and Telegram.