CI/CD for Static Website with AWS + Terraform

In the previous part, we have done all required to deploy the static website on AWS. But there was a problem — when you make changes, you need to type commands for deployment manually — it sucks. In this part, we will create CodePipeline that will update our website each time we make a commit in the specific branch.
Step by Step
-
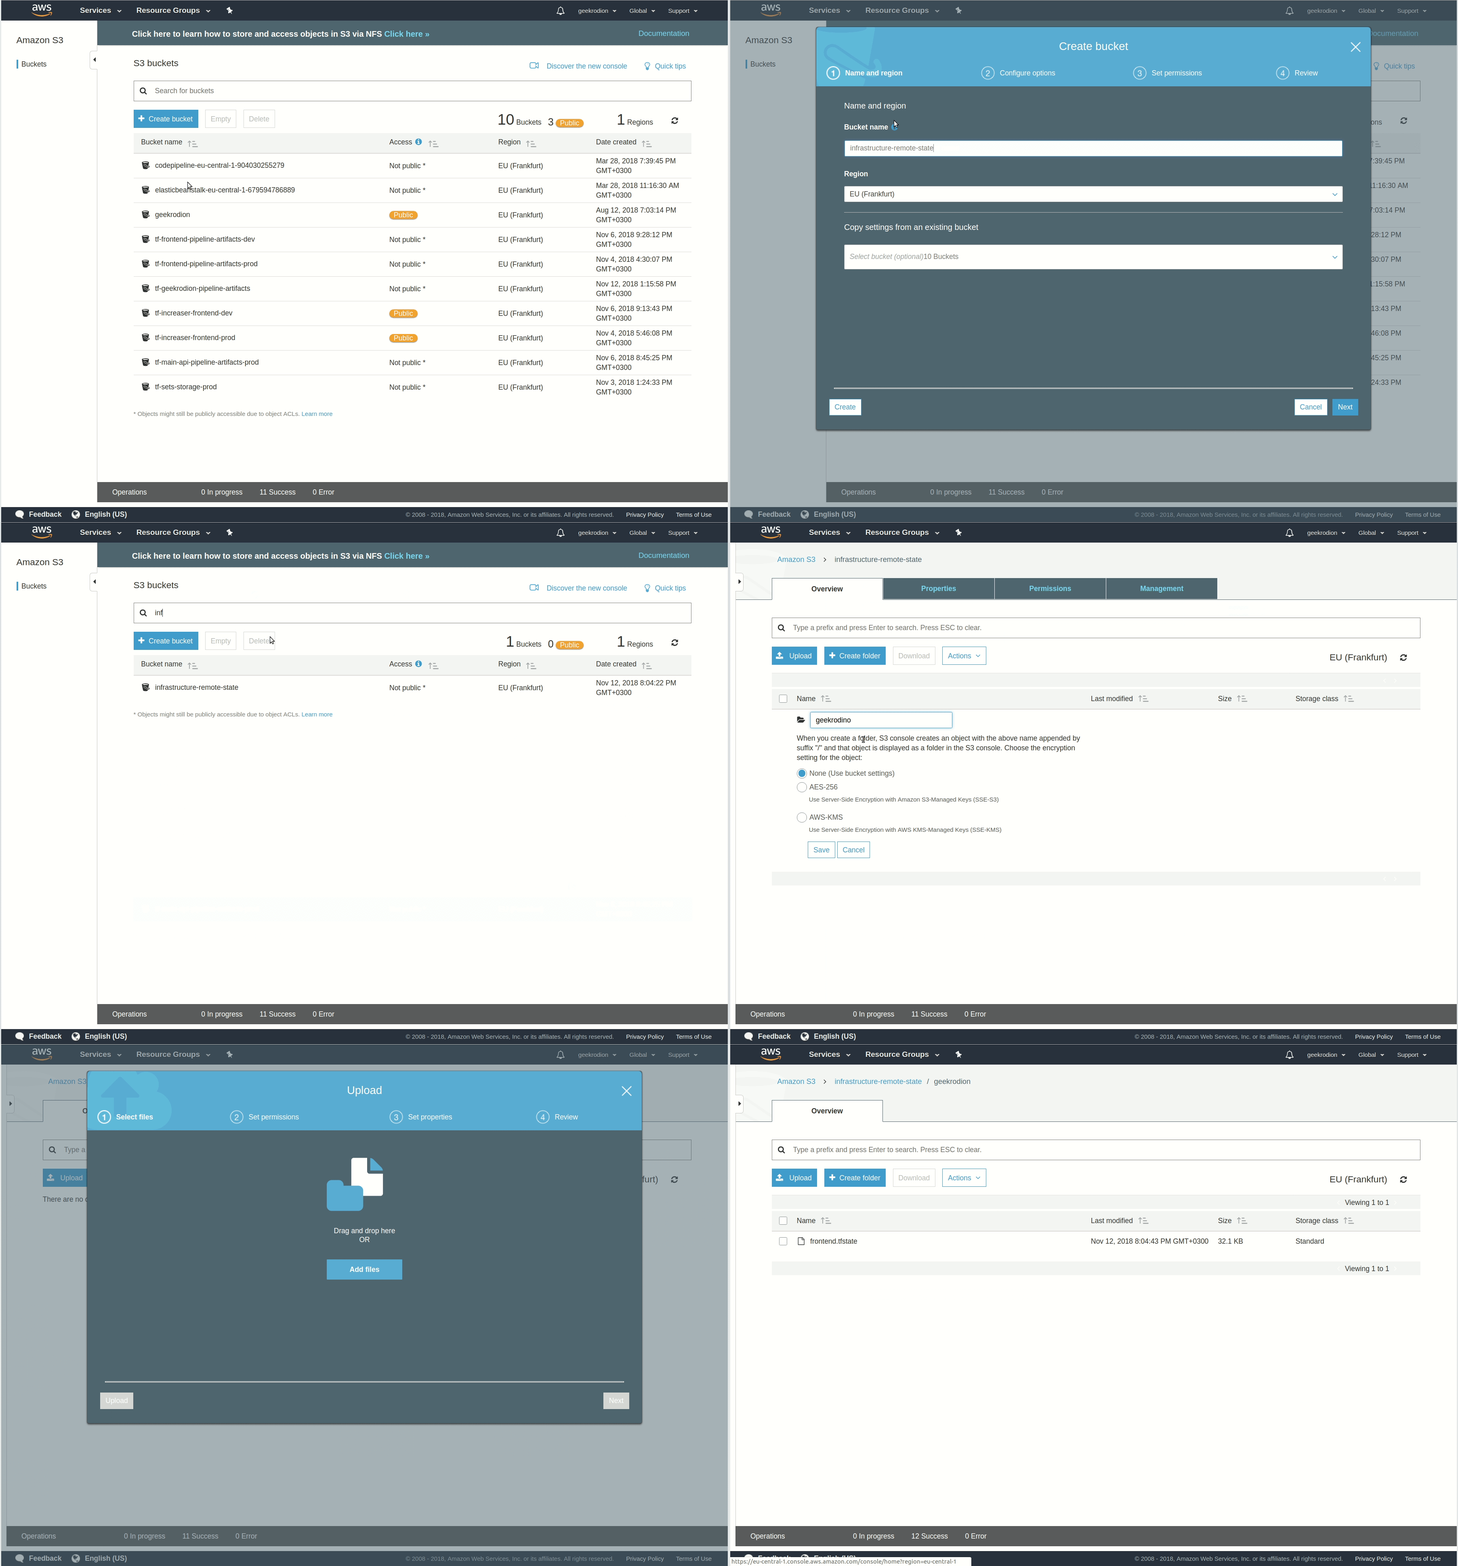
Setup remote storage for Terraform state.
-
Create and deploy a CI container to ECR.
-
Make the CI pipeline with CodePipeline and CodeBuild.
-
Add buildspec.yaml in the root of the repository.
Remote state
In the previous part, we kept the state in the repository. Now our Terraform state will keep our AWS credentials. Because of this, we will start with creating an S3 bucket for Terraform state. Then we can move the state from the repository to the bucket.

To let Terraform know about the remote state we will add this part in main.tf:
...
terraform {
  backend "s3" {
    bucket = "infrastructure-remote-state"
    key    = "radzion/frontend.tfstate"
    region = "eu-central-1"
  }
}
...
Now, we can type:
terraform initCI/CD container
If we need a container, we should create Dockerfile first.
FROM node:latest

RUN apt-get update \
  && apt-get install -y python-dev \
  && curl -O https://bootstrap.pypa.io/get-pip.py \
  && python get-pip.py \
  && pip install awscli
In my case, to build website nodeJS needed so we will use node as a base image. Also, we will install additional libraries to run AWS commands inside of the container.
We will use ECR as a container registry. So let’s create a repository, by adding resources to the existing Terraform file.
resource "aws_ecr_repository" "ci" {
  name = "tf-ci"
}

resource "aws_ecr_repository_policy" "ci-policy" {
  repository = "${aws_ecr_repository.ci.name}"

  policy = <<EOF
{
  "Version": "2008-10-17",
  "Statement": [
    {
      "Sid": "everybody",
      "Effect": "Allow",
      "Principal": "*",
      "Action": [
        "ecr:*"
      ]
    }
  ]
}
EOF
}
After running terraform apply, time to push the container to the repository. There is a script for this.
#!/bin/bash

REPOSITORY_URL=${AWS_ACCOUNT_ID}.dkr.ecr.${AWS_REGION}.amazonaws.com/tf-ci

eval $(aws ecr get-login --no-include-email --region $AWS_REGION)

docker build -t $REPOSITORY_URL:$1 .
docker push $REPOSITORY_URL:$1
Before running script, be sure you set all required variables, and you have docker on your machine.
. ./push_ci_container.sh radzionThe name of the container will be the parameter you pass to the script:)
CodePipeline
Now it is the time to create some real infrastructure:) First let’s specify all required environment variables.
To go along, you need to set these variables:
export AWS_ACCESS_KEY_ID=<YOUR_AWS_ACCESS_KEY_ID>
export AWS_SECRET_ACCESS_KEY=<YOUR_AWS_SECRET_ACCESS_KEY>
export AWS_REGION=<YOUR_AWS_REGION>
export GITHUB_TOKEN=<YOUR_GITHUB_TOKEN>
It all clear about the first three variables. Since we keep our site on GitHub, we need to specify token. It quite simple to get, you can find steps there.
Also, we need additional variables in vars.tf file. We will specify AWS credentials, the name of the CI container(this is a parameter we pass in push_ci_container script) and variables describing the repository.
variable "domain" {
  default = "radzion.com"
}

// optional
variable "bucket_name" {
  default = "radzion"
}

// new variables
variable "region" { }

variable "access_key" { }

variable "secret_key" { }

variable "ci_container_name" {
  default = "radzion"
}

variable "repo_owner" {
  default = "radzionc"
}

variable "repo_name" {
  default = "radzion.com"
}

variable "branch" {
  default = "master"
}
There are quite a lot of new resources, and we will not list them here, but you can find them in the repository. And resources quite simple, the only part that I would like to dwell upon is aws_codebuild_project.
resource "aws_codebuild_project" "codebuild" {
  name         = "tf-codebuild-${var.bucket_name}"
  service_role = "${aws_iam_role.codebuild_role.arn}"

  artifacts {
    type = "CODEPIPELINE"
  }


  environment {
    compute_type = "BUILD_GENERAL1_SMALL"
    image        = "${data.aws_caller_identity.current.account_id}.dkr.ecr.${var.region}.amazonaws.com/tf-ci:${var.ci_container_name}"
    type         = "LINUX_CONTAINER"

    environment_variable {
      name = "AWS_ACCESS_KEY_ID"
      value = "${var.access_key}"
    }
    environment_variable {
      name = "AWS_SECRET_ACCESS_KEY"
      value = "${var.secret_key}"
    }
    environment_variable {
      name = "AWS_DEFAULT_REGION"
      value = "${var.region}"
    }
    environment_variable {
      name = "BUCKET"
      value = "${var.bucket_name}"
    }
    environment_variable {
      name = "DISTRIBUTION_ID"
      value = "${aws_cloudfront_distribution.frontend.id}"
    }
  }

  source {
    type      = "CODEPIPELINE"
  }
}
In this resource, we specify an image for building a website and butch of variables. As you may remember from the previous part, those are required to make the deployment.
buildspec.yaml
This file specifies steps to execute in CI pipeline. In my case, I only need to install libraries and call the deployment script we made in the previous part.
version: 0.2

phases:
  install:
    commands:
      - cd front
      - npm install
  build:
    commands:
      - . ./management/deploy.sh
That’s it! Now you can go to aws.amazon.com, and watch CodePipeline building your website.